


I’m a firm believer in if you can do something yourself, don’t pay someone else to do it. Most of us are on a budget, right? And if I can backsplash my kitchen, anyone can.
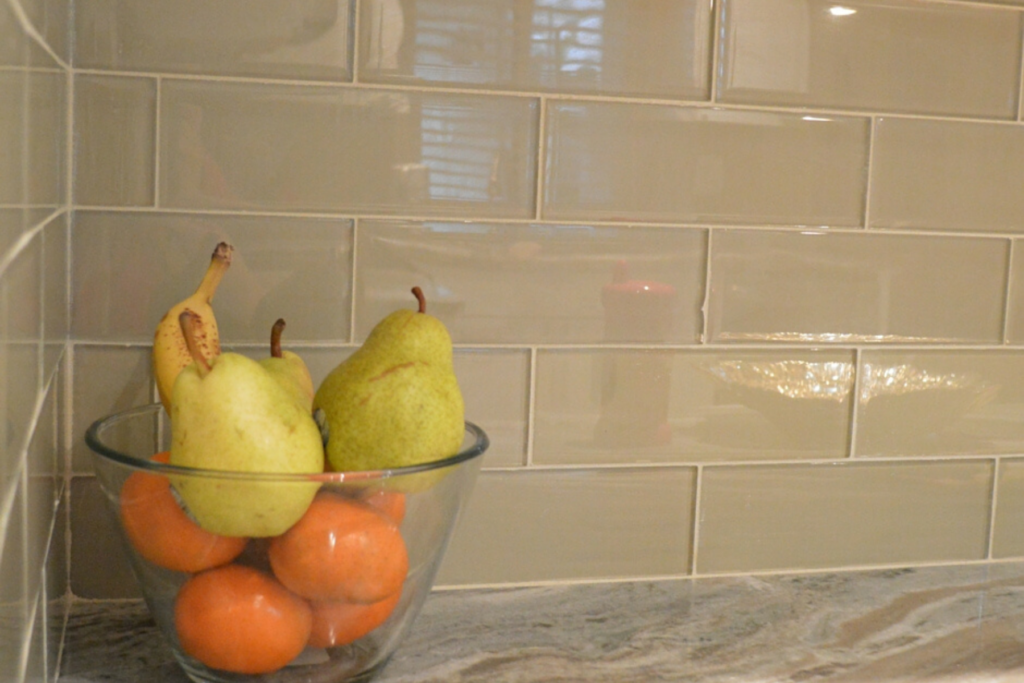
While some people might opt for ceramic tile, porcelain tile, or natural stone, I love the look of glass subway tiles in a kitchen design or bathroom design. Because they come in so many different colors, it’s a great way to keep a backsplash design clean and classic, but with a hint of color. A popular choice is choosing neutral colors since it’s a pretty permanent job.
Why Glass Subway Tile?
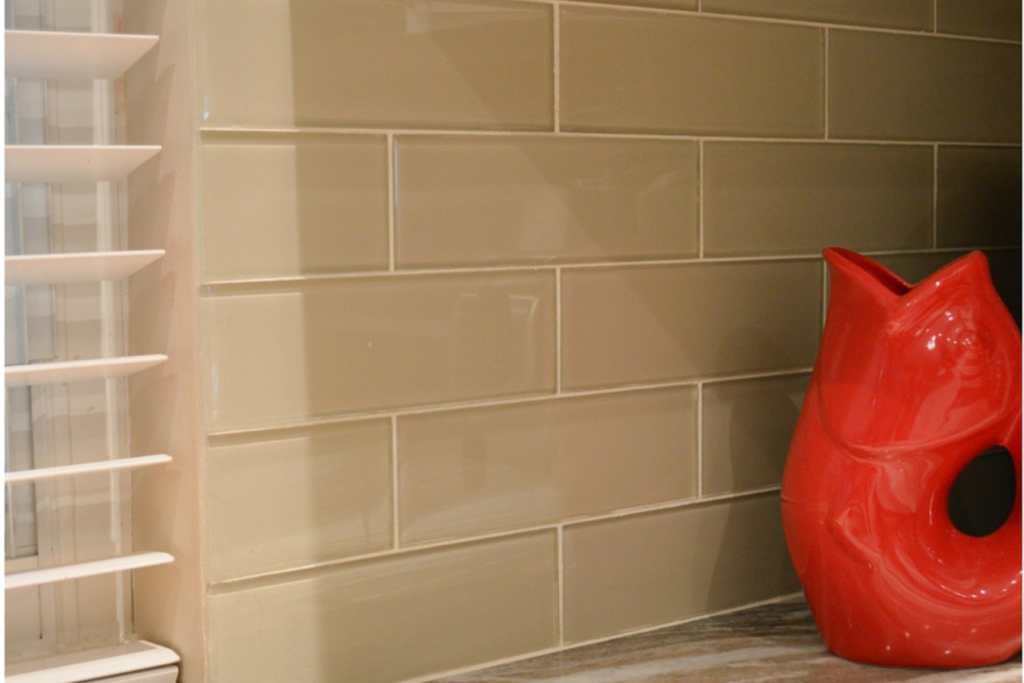
Glass subway tiles also make small spaces look even better thanks to the bit of reflection. In my opinion, classic subway tile reminds me of public bathrooms but making them glass creates a unique look, enhances natural light, and tops many current design trends.
You can also lay this out in a variety of ways. The herringbone pattern is one of my favorites, but I’m keeping things simple for my first attempt at laying glass tile backsplash in my kitchen ensuring the new tile matches my countertop of goes well with my stainless steel appliances for a complete, modern look.
Plus, I’m an avid HGTV and DIY Network viewer and love to pretend to be a host in my spare time at home. After watching an episode of Income Property, I thought – why not take a stab at this myself?
Keep in mind, this is the most difficult, pain in the you know what backsplash I’m talking about here. Individual glass subway tiles. Not those big sheets with 10+ tiles already in them with the mesh backing. I’m talking individual tiles. Laying them one by one. Spacing them out, one by one. Yeah… but again, trust me when I say you can also install individual glass subway tile in your kitchen… because I did it.
Note: We also got some new countertops right before we took on this home improvement renovation. Out previous countertops and backsplash were painted wood. Yes, painted wood glued above the cabinets and to the wall. Ew! Also, new countertops = new sink and faucet.
Now, back to the backsplash.

What you Need to Backsplash Your Kitchen with Glass Subway Tile
Glass Subway Tile
Measure your wall or surface area and buy a little extra. Note: Glass tile is not easy to cut and it breaks easily.
Mortar or Mastic
It’s what you put on the wall to stick the tile to.
Grout
Pick a color you like!
Spacers
For me, the smaller the better. Thicker grout is kind of outdated.
Wet saw
For the glass cutting. Note: Cutting a tile to fit around an outlet = challenging.
Trowel
This is the tool you use to apply the mortar or mastic, then the grout. It’s also known as a grout float.
Sponge
To clean off the grout after applying it.
Sealer
To make sure your grout doesn’t stain.
Now, that you have what you need, this is how to backsplash your kitchen (or any other area of your home) with glass subway tile:
How to Backsplash Your Kitchen with Glass Subway Tile
1. Measure your wall.
The first thing you need to do is multiply the width and height of the wall to get square footage. The square footage determines how much tile you’ll need for the project. (Remember, buy more than what you need.)
2. Organize your workspace.
You can do this by pulling out your oven or range hood, removing outlet covers, taping off your countertop to protect it from debris, etc.
3. Do a practice tile lay.
We have a microwave in one corner, so since we knew that corner would be covered up, we started at the opposite end. (My recommendation is to start laying tile at the end that is more of a focal point so the lines look cleaner and evener.) Tip: For a clean start right, caulk a straight line where the wall meets the counter and smooth it out.
4. Prepare your mortar or mastic.
It’s really just adding water and stirring.
5. Lay the tile.
Ah, you’re really starting to transform your blank canvas! For this next step, start at one end, at the bottom just right above the counter, and apply the mortar or mastic to the wall. Put it on using the flat side of the trowel, but then turn the trowel to use the grooves to ensure you aren’t applying it too thick and evenly. (I think it works best if you hold it at a 45-degree angle.)
After you get it on, place your glass tile over it and push firmly. Do it one more time right next to the tile you just did.
6. Add tile spacers.
Do this to keep the tiles lined up perfectly. (You can use a level to ensure they are straight, but if you use the countertop as a level, that should work too. It’s what I did.) Keep doing this until you reach an outlet or corner. When that happens…
7. Cut the glass tile.
You do this to go around the outlet or fit into the corner. (Do it slowly and carefully!) I measured and marked on the back of the tile where to cut. This took us a long time because we did it outside after work in the winter in Florida. So, it got dark early and we could only cut so much kitchen backsplash tile at a time.
8. Let it dry.
After you tile your entire wall or room, let it dry for 24 hours. (Since this was an off-and-on project for three weeks, not a problem!) Also, make sure it’s squeaky clean and there isn’t any mortar or mastic left on the tile.
9. Prepare your grout.
You will do this by just adding water and stirring as you did with the mortar or mastic.
10. Grout.
Use the trowel to fill in the spaces with grout. Unlike the mortar, you don’t have to wait until this dries. You can wet your sponge and wipe off the excess in just a couple of minutes. (I found it best to work in 2 feet x 2 feet sections.)
11. Clean the edges.
Some people buy another shape of tile to finish off the edges. I didn’t do that. Instead, I just ended it. (I think it looks more modern this way.) So, I just covered the visible edges with grout and smoothed it out with a damp sponge.
12. Seal the grout
Do this to prevent it from staining.
You can use beautiful glass tiles in a variety of ways. Whether you use a smaller size or bigger size, your personal style and color scheme will help you create your dream kitchen.

Okay, looking back at everything I’ve just written, it sounds like a lot. It’s really not. And remember, this is the most time-consuming kind of tiling. While I think it looks beautiful, I think I’m going to go with the sheets next time. I love the look of rectangular subway tile, but it’s no walk in the park. For more lifestyle blog posts, click here.
Money-saving tip!
If you don’t have a ton of glass subway tile to buy, ask to visit the “backroom” to check out what extras or almost out-of-stock tile costs. You can save big money this way to turn your outdated kitchen into a modern kitchen. It’s the first place I stop for glass backsplash tiles… and honestly anything else I need for my home improvement project!
Money-making tip!
If you have enough space in your home, consider using part of your home as an income property. It’s what the DIY Network’s Income Property is all about!
Here are some pictures of other kitchens designed by a host and licensed contractor Scott McGillivray. Income Property is premiering with brand-new episodes on Thursday nights at 10:00 EST on the DIY Network. The episodes feature a never-before-seen makeover and reveal great renovations and tips for turning your home into an income property.
Again, here are some pictures (courtesy of DIYNetwork.com) of what has been done on Income Property. (I love the rustic look! Next project.)


This is a sponsored conversation written by me on behalf of DIYNetwork.com. The opinions and text are all mine.


Excellent work, maybe I can just hire you when want some tile work done!! 🙂
Hahaha. No, you can’t hire me. I’m done!!!
I love your kitchen! Your tile looks great, it looks so nice with your countertop & cabinets. Must be a really nice space to cook and spend time in ?
Thank you! Now, I just need to learn how to cook 😉
Yes! I love this look, will have to come back to this when we get a house
Thanks Hayli. It’s easier than you think!
We didnt do our backsplash when we re did our kitchen since at the time we couldnt decide which tile we wanted.. now 2 years later it is still bare!! My hubby did the backsplash at our last home.. maybe I need to get on him about this one!
Oh yes, put him to work, haha! Then blog about it 😉
Lovely work! Seems like it would be quite a undertaking- I always get nervous about projects of this scale.
I was too, but trust me – it is so much easier than it looks!
Wow – you did an excellent job with this post. I love all the references and it turned out so professional. Made a world of difference.
Thank you!
Girlfriend you ROCKED it! This looks amazing! What a great makeover…I’m in awe!!
Thank you!!!
OMG– That looks so good! 🙂 Congrats to you and your husband for that great project. Looks like a “real professional” did it! Awesome! YOU GUYS ROCK!
love me some DIY! love me some saving money too! looks fab!
Haha – thank you!
One of the most important concepts is to have PATIENCE. Especially, when doing a task that you are not familiar with. Of course, having the proper tools can help as well, but it can be done by the DIY!
Great info on the glass subway tile backsplash install. Time and patience and it really turned out awesome!
This is a great tip particularly to those fresh to
the blogosphere. Simple but very precise information…
Appreciate your sharing this one. A must read article!
Thanks so much, Cesar.
Looks great! What color/brand tile is this? What color grout did you use? How much spacing did you allow for the grout? I saw some sites mentioned that the white in the back of the tile scratched off, did you run into this when cutting it?
Thank you!
Thanks – I used an offwhite grout and I used the smallest spacers I could buy because I didn’t want a lot of grout. The color looks a tad green, but I was going for a tan. Because it’s glass, it reflects everything which is really nice. And if anything scraped off the back, you can’t tell at all when it’s on the wall 🙂